The Manage Inventory at a Location utility allows you to efficiently add, update quantities, move, and delete inventory from a specified location.

Accessing the Utility
To access the Utility, use the “Edit Location“ button located at the top-right corner of the Inventory Modules.
Once the utility opens, use the Choose Location input to select the location you want to manage.


Print Inventory At Location Report
After selecting a location, the Print button will become available. Click the Print button to Generate a PDF Report of all the Inventory at the Selected Location.
.png?cb=e3da2e95a88199d50ec5bece82b71442)
Top Tip: You can also generate the “Inventory At Location” PDF Report from the Card View.

Add to Location
After selecting a location, the Add button will become available. Click the Add button to open a list of all inventory.
-
Utilize the search fields to quickly find inventory.
-
Use the checkboxes to select multiple inventory.
-
Confirm your selections to add the chosen inventory to the selected location.


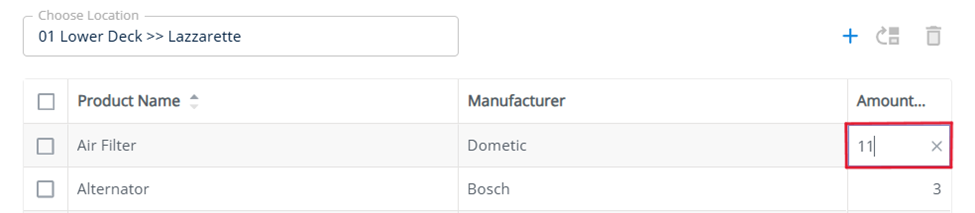
Update Amount at Location
Double Click the Amount Column, type in the new Amount then press the “Enter” Key on your Keyboard.

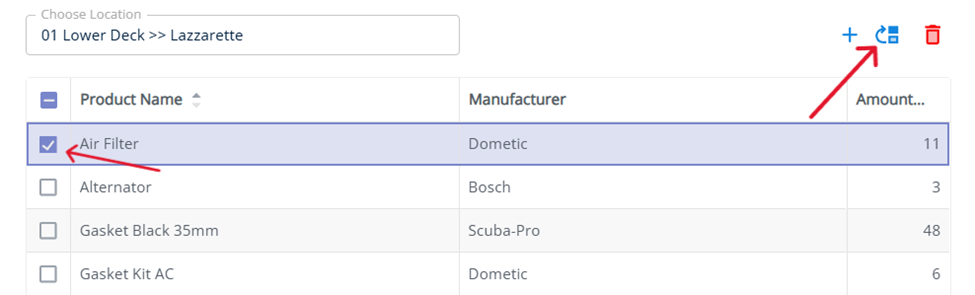
Move Inventory to a New Location
After selecting a location, the grid will display the inventory items currently stored in that location.
-
Use the checkboxes to select the inventory items you want to move.
-
Click the Move button.
-
Choose the new location where you want to move the selected inventory items to.

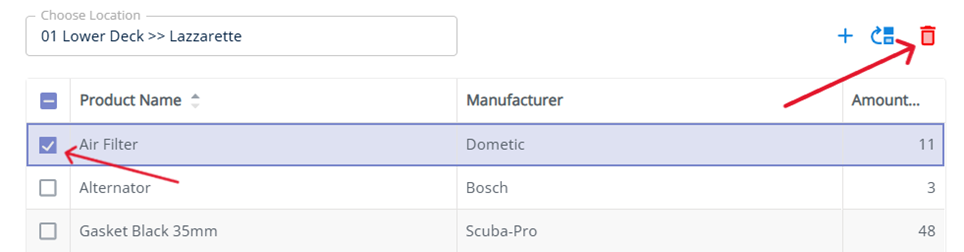
Delete Inventory from Location
-
Use the checkboxes to select the inventory items you want to remove from the selected location.
-
Click the Delete button.
-
Confirm you want to Remove the Inventory from the selected location, this action cannot be undone.